Restoration of our 1980 Hunter 27 sailboat

Documenting the restoration and sailing of our boat, also this will be a source of information about these boats. I will have brochures, manuals, and specifications available. Photos will be posted and they are also viewable in my Flickr stream on the right. Documentation I collect on the boat is also on the right.

Wednesday, March 3, 2010

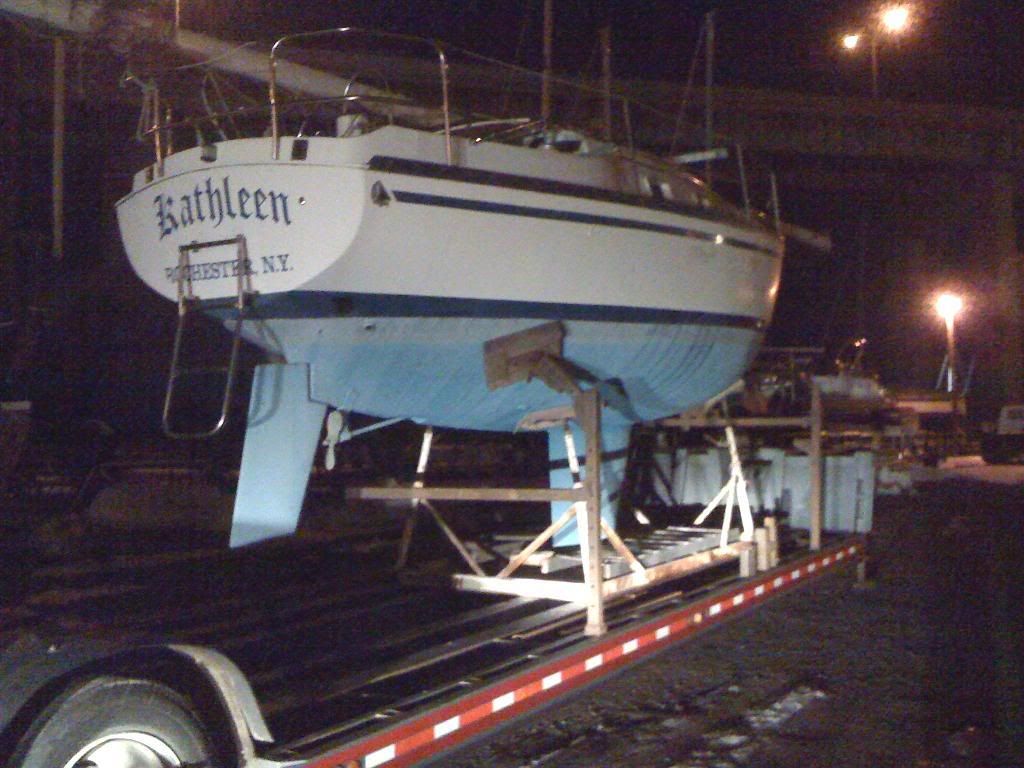
Well, quite a lot has been done the last few weeks, but it still feels like I'm not getting very far, I am about done with the electrical. The bilge pump works, the fancy new LED nav lights work, everything else electrical works, I even cranked the engine over yesterday (first time!) Of course the starting battery is toast, it sat for 2 years, I can charge it to 12.6v but a load test shows very little capacity, it worked good enough for me to test everything though, and since I have all the AC rewired and working, I can run the battery charger and have 
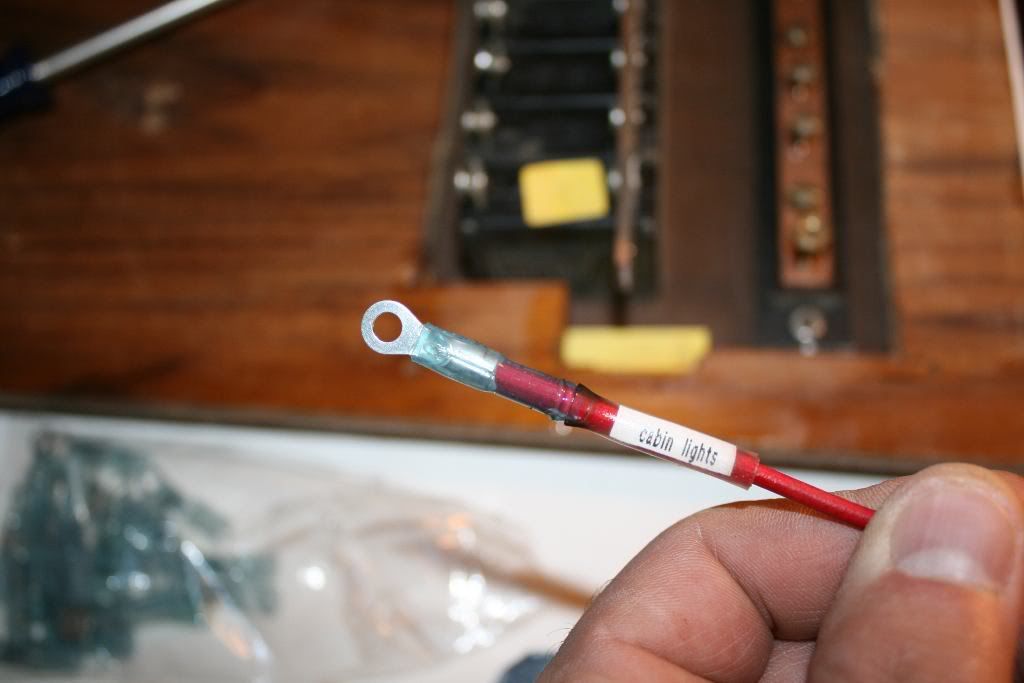
lights in the cabin! I also have a little $20 electric heater, it has two settings, 700w and 1500w, the 700w setting warms the cabin from say 30 degrees to a comfortable 55 in about 10 minutes. It is not that effective when it's 15 degrees out but luckily those days are past us this year. New house bank is on the float charger in my basement (two group 31's, Interstate MHD's I get them from work CHEAP) so now I still need a starting battery. And I need to rewire the mast.

My plan was to start on the mechanical systems after the electrical was done, and yesterday I did just that. I fixed the steering! The steering works like this (experienced sailors can skip this part, this is for my family and friends) at the wheel there is a sprocket attached to a chain, the chain turns with the wheel, attached to both ends of the chain there is a cable, it rides on pulleys under the cockpit floor. Those pulleys change the direction of the cable from vertical to horozontal, the cables then go to a large idler attached to the rudder post.


The problem with my boat is the bolts that hold the ilders in their position (they are adjustable) fell off, so they were just flapping around and the cables fell off the pulleys. So I had to stick my head down the hatch and hang upside down while I put new nuts on the bolts, reroute the cable, climb out of that hatch and squeeze into the other one, attempt to route the cables on to the big idler, feel the cable fall off the pulleys (I can't see the pulleys from here) wiggle out, go into the other hatch, repeat until I get it right. Then I had to tighten the steering, then test it for binding (it did) loosen the bolts and get the pulleys to be in line with the cable, retighten, and check again. Now it works beautifully. All that sounded hard and time consuming, but it all took about an hour at the cost of a headache from hanging upside down for too long.

Next task is to fix the leaky fuel return lines. Of course they are braided, and they have compression fittings....That haven't been made in 30 years. So I asked the mechanic at the yard if they can make new ones, he said nope, but you can cut the flange off, there is a barb underneath that you can attach new lines to. I immediately understood what he's saying, it's like an air line or flexible brake lines (an air line you can fix that way, a brake line you cannot! So don't try it at home). Of course the fuel lines are tiny, 3/16" ID, and both sail supply stores don't have them, West Marine never heard of them despite the fact they are on their website, so I ordered those, that will be an easy fix.

I also installed a new bilge pump, a fully automatic kind but I bought it not knowing how it works, it runs every 2.5 minutes and checks for water, that will get super annoying real quick so I think I'll still use a float switch.

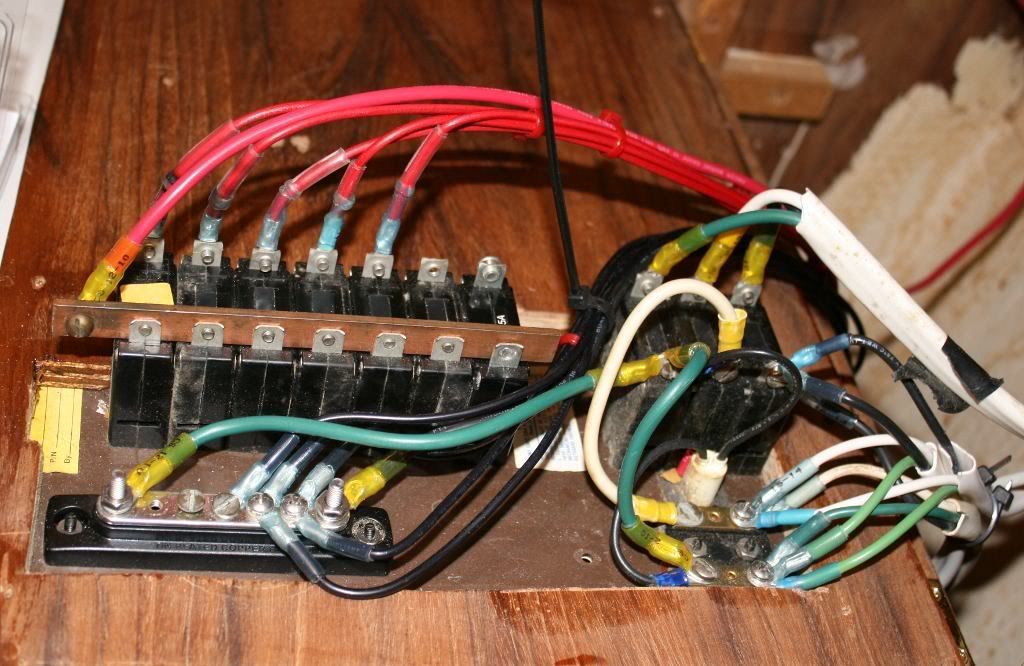
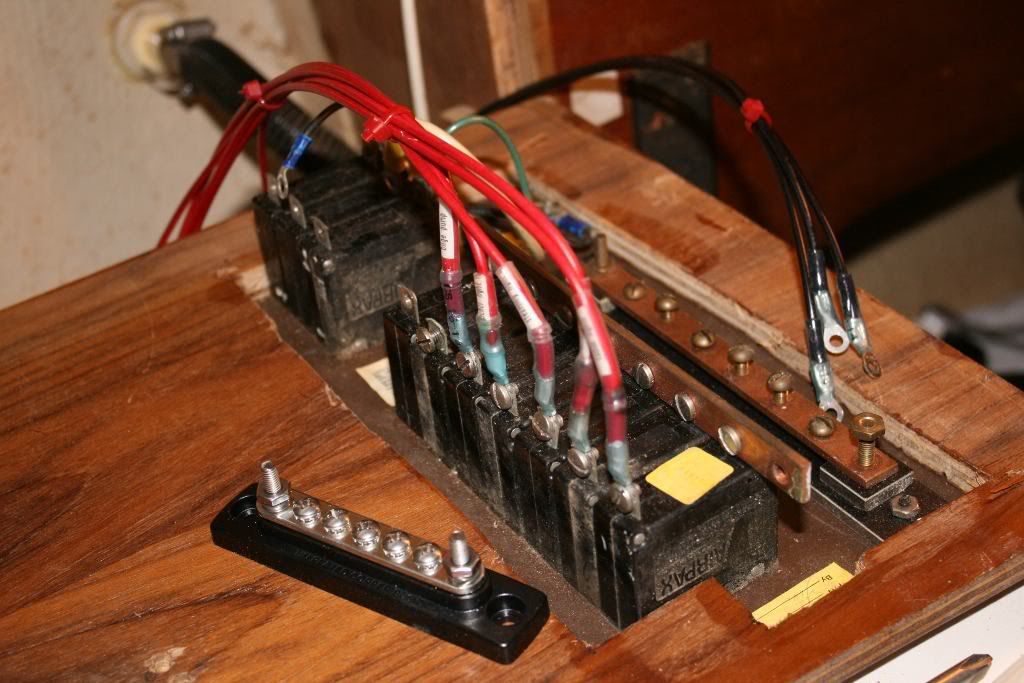
Almost finished wiring, the AC is different now, I added two short bussbars for neutral and ground. Next year I'm getting 2 separate panels, one for AC, one for DC. I don't like them both on the same panel.

Monday, February 15, 2010

Making cushions

I hate starting a project when one isn't finished yet (nav station/electrical) but this one can be done at home when it's too cold outside, so I decided to start the cushions now, I think they turned out excellent considering this is the first thing I have ever sewed that wasn't a button.

For this project I referenced two Good Old Boat articles. The 'Big Bed Mod" in the July/August 2001 issue (#19) and the "DIY Boat Cushions" in the Nov/Dec 2009 issue (#69). The big bed issue (Which was also a Hunter 27! )the author made new cushions for the middle and left the old ones alone. I made all new cushions and modified the shape of them instead. The old ones went into the head through little openings so a 6'er can lay down, well since I can't even get my feet through the little openings that was never going to happen, so I made a modification. The settee bottom cushions will go in the middle, and the settee backs will then lay flat on the settee's, making almost a queen sized bed across the width of the cabin. The settee backs are 3" taller than the old ones, when everything is flat the bed will be 58"x78" with a good foot to spare.

The cushions article is great, but it assums things...like the fact that you know how to sew, I do not. But I do now! So it was a little frustrating until I got the hang of it.

Saturday, February 6, 2010

Wiring the boat

I have begun rewiring the boat, it's COLD outside so I didn't get too far. I'll go back tomorrow and work until I get too cold. I purchased all the wire online for less than half what it would have cost me at a retailer, also bought some 14-16ga, 10-12ga heat shrink terminals, and some clear shrink wrap. What I did is put labels under the shrink wrap identifying the circuit. I printed these on a thermal labelmaker and was afraid heating the shrinkwrap with the labels under them would turn them black, but it didn't, they turned out perfect. I did have trouble getting them shrunk however, it's so cold that both the torch lighter and the regular Bic lighter I had on hand simply refused to light. Warming them up next to the little space heater seemed to work, but they were still unreliable at best. So you can see some carbon deposits on some of the shrinkwrap.


As you can see I didn't finish the grounds, the terminals don't fit on this bus bar, I'm going to put them on the new bus bar. I am going to replace this ugly woodgrain panel anyway.

Tuesday, January 26, 2010

Converting the nav station and moving the electrical panel...


Now that my boat is home I have accelerated the work on the electrical system and the nav station conversion. As I outlined in my previous post I wanted a nav station like the later H27's and I want to move the electrical panel up to a normal level, and not on the floor like it is now. Here is the hanging locker as it came from the factory...


The reason is, I want a place to sit other than the setee table, and that electrical panel is in the worst possible position. Not only can you step on the switches and break them (look, one is already broken) but if you take a wave over the stern, that's the first thing that's going to get wet. So, here's the destruction and rebuilding...


And today I bought a $39 copt of the Fein multitool at Harbor Freight, it's an amazing little tool, I was able to trim and cut out the new electrical panel in 1/4 the time it would have taken with a drill and a jigsaw. It's not finished yet, but you can get an idea what I'm doing. I still have a lot of trimming and finishing left to do...

Friday, January 22, 2010

It's Home!


It's still on the trailer because the yards travelift is broken, but it's home! Kind of a surprise too, I called the broker this morning just to see if they got the mast down yet, he tells me not only is the mast being taken down this morning, but a truck is on it's way back from Sodus Point empty, and will be picking the boat up this afternoon, saving me $300 in transport costs, so score and SCORE! Of course I had to work until 9 today, and had to really resist dropping everything, driving out to Rochester, and watching the process unfold. Something I hoped to do next week, but now it's here, and I didn't have to be stressed out watching it happen. So now an hour and 15 minute drive turns into an 8 minute drive...

Sorry about the crappy iPhone pics, was not prepared, don't usually bring the Rebel to work.

Tuesday, January 12, 2010

It's official! It's ours!

It's official, the boat is mine. I went down today to collect the sails, cushions, batteries,and begin the work. First of all, the electrical system is a joke, everything non-Hunter has to go. The previous owner may have been an excellent aircraft mechanic, and maintained the engine perfectly, but he knew nothing about boat electrical. he has 2 batteries in there, a Die Hard sealed car battery (11.5v) and a "USED BATTERY" (completely dead). Gonna be used as a core for trade in along with the other one. This is where the batteries and charger were before I ripped everything out. I will be moving the batteries underneath the seat just behind the switch panels, and rewiring pretty much everything.


I also gathered the sails and cushions, it has one good sail, the genoa, and 3 junk sails.

Monday, January 11, 2010

Gathering Parts


The last couple weeks I have been gathering parts, a set of ST50 wind, depth, and speed instruments and an 18 watt solar panel. I also painted a section of sailfish hull I kept just for this purpose, it's an experiment on stripper methods. I'm going to try Easy-Off on the deck paint which I believe is a single part paint. The Easy-Off should easily strip it while not harming the gelcoat. I'm not too worried about harming the gelcoat because I plan on painting with a 2-part paint and adding some sort of non-skid in sheet form, like Treadmaster or Nautolex Decko-Dot. Maybe even go ALL OUT and get some Flexiteek, although it's pretty expensive.

Tomorrow I'm going to actually PAY for the boat, and start some work! But not much work as it's supposed to be 20f max. I'm going to measure the companionway drop boards, cutlass bearing, remove the exhaust elbow, change the lock to MY lock, install the solar panel and check the batteries. I might move the batteries as well, I do not like where they are.